New template added to Automated Workflows
timestamp1646159491474
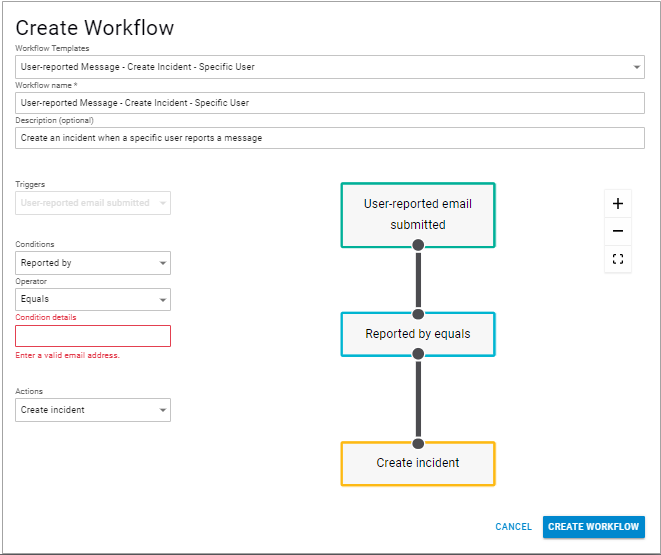
Rather than creating a completely new automated workflow, you can use workflow templates as a starting point to create workflows for common scenarios. For example, you can use the User-reported Message - Create Incident - Specific User template to create a workflow to create an incident whenever a specific user reports a message. When you select the template, the workflow appears automatically. On the left side of the page, you are prompted to complete the condition, in this case, to specify the user who is reporting the message. You can optionally change other parts of the workflow, for example, to change the condition to add another user, to add the number of affected mailboxes, and so on. Be sure to specify a unique name for each workflow you create.
Additional workflow templates will be added over time.
Creating an Automated Workflow using a Template
To create an automated workflow using a template:
Open Incident Response.
From the menu in the upper left corner, select Automated Workflows.
On the Automated Workflows page, click Create Workflow.
Under Workflow Templates, a specific template, such as User-reported Message - Create Incident - Specific User, to use as the basis for creating a workflow.
Provide a unique name for the workflow.
Optional. Provide a description for the workflow.
On the left side of the page, red text indicates conditions you must enter to customize the template. In this example, provide the email address for the user who is reporting emails. Complete the information. Notice it automatically updates in the workflow.

Optionally add more conditions or actions, as described in the section above.
Review the graphical representation of the workflow. If needed, take actions as described in the section above.
Click Create Workflow.
The workflow appears in table on the Automated Workflows page. It is ready to launch whenever it is triggered.
More information, please visit campus
Did you like this update?
![]()
![]()
![]()
Leave your name and email so that we can reply to you (both fields are optional):